Custom Home Builders Mornington Peninsula: Plaster & Tiling Stage
Mt Martha New Build: Internal Linings and Wet Area Works Underway
At TEMSEA Building Group, the transition from a closed-in shell to a recognisable interior is one of the most pivotal stages of any build. It’s the point where lines, light, and proportion finally read the way the drawings intended. On this current Peninsula project, two trades are running in parallel: plasterboard installation is nearing completion across the home, while tiling and waterproofing works have commenced in the wet areas.
This is the stage where surface finish meets structural performance. The plaster work shapes how the home will feel — light, volume, ceiling lines, and the crispness of every junction. The tiling works, particularly across the three bathrooms, demand a far less visible but arguably more critical layer of detail: the waterproofing system that sits beneath every tile and protects the home for decades to come.
Plasterboard Installation Nearing Completion
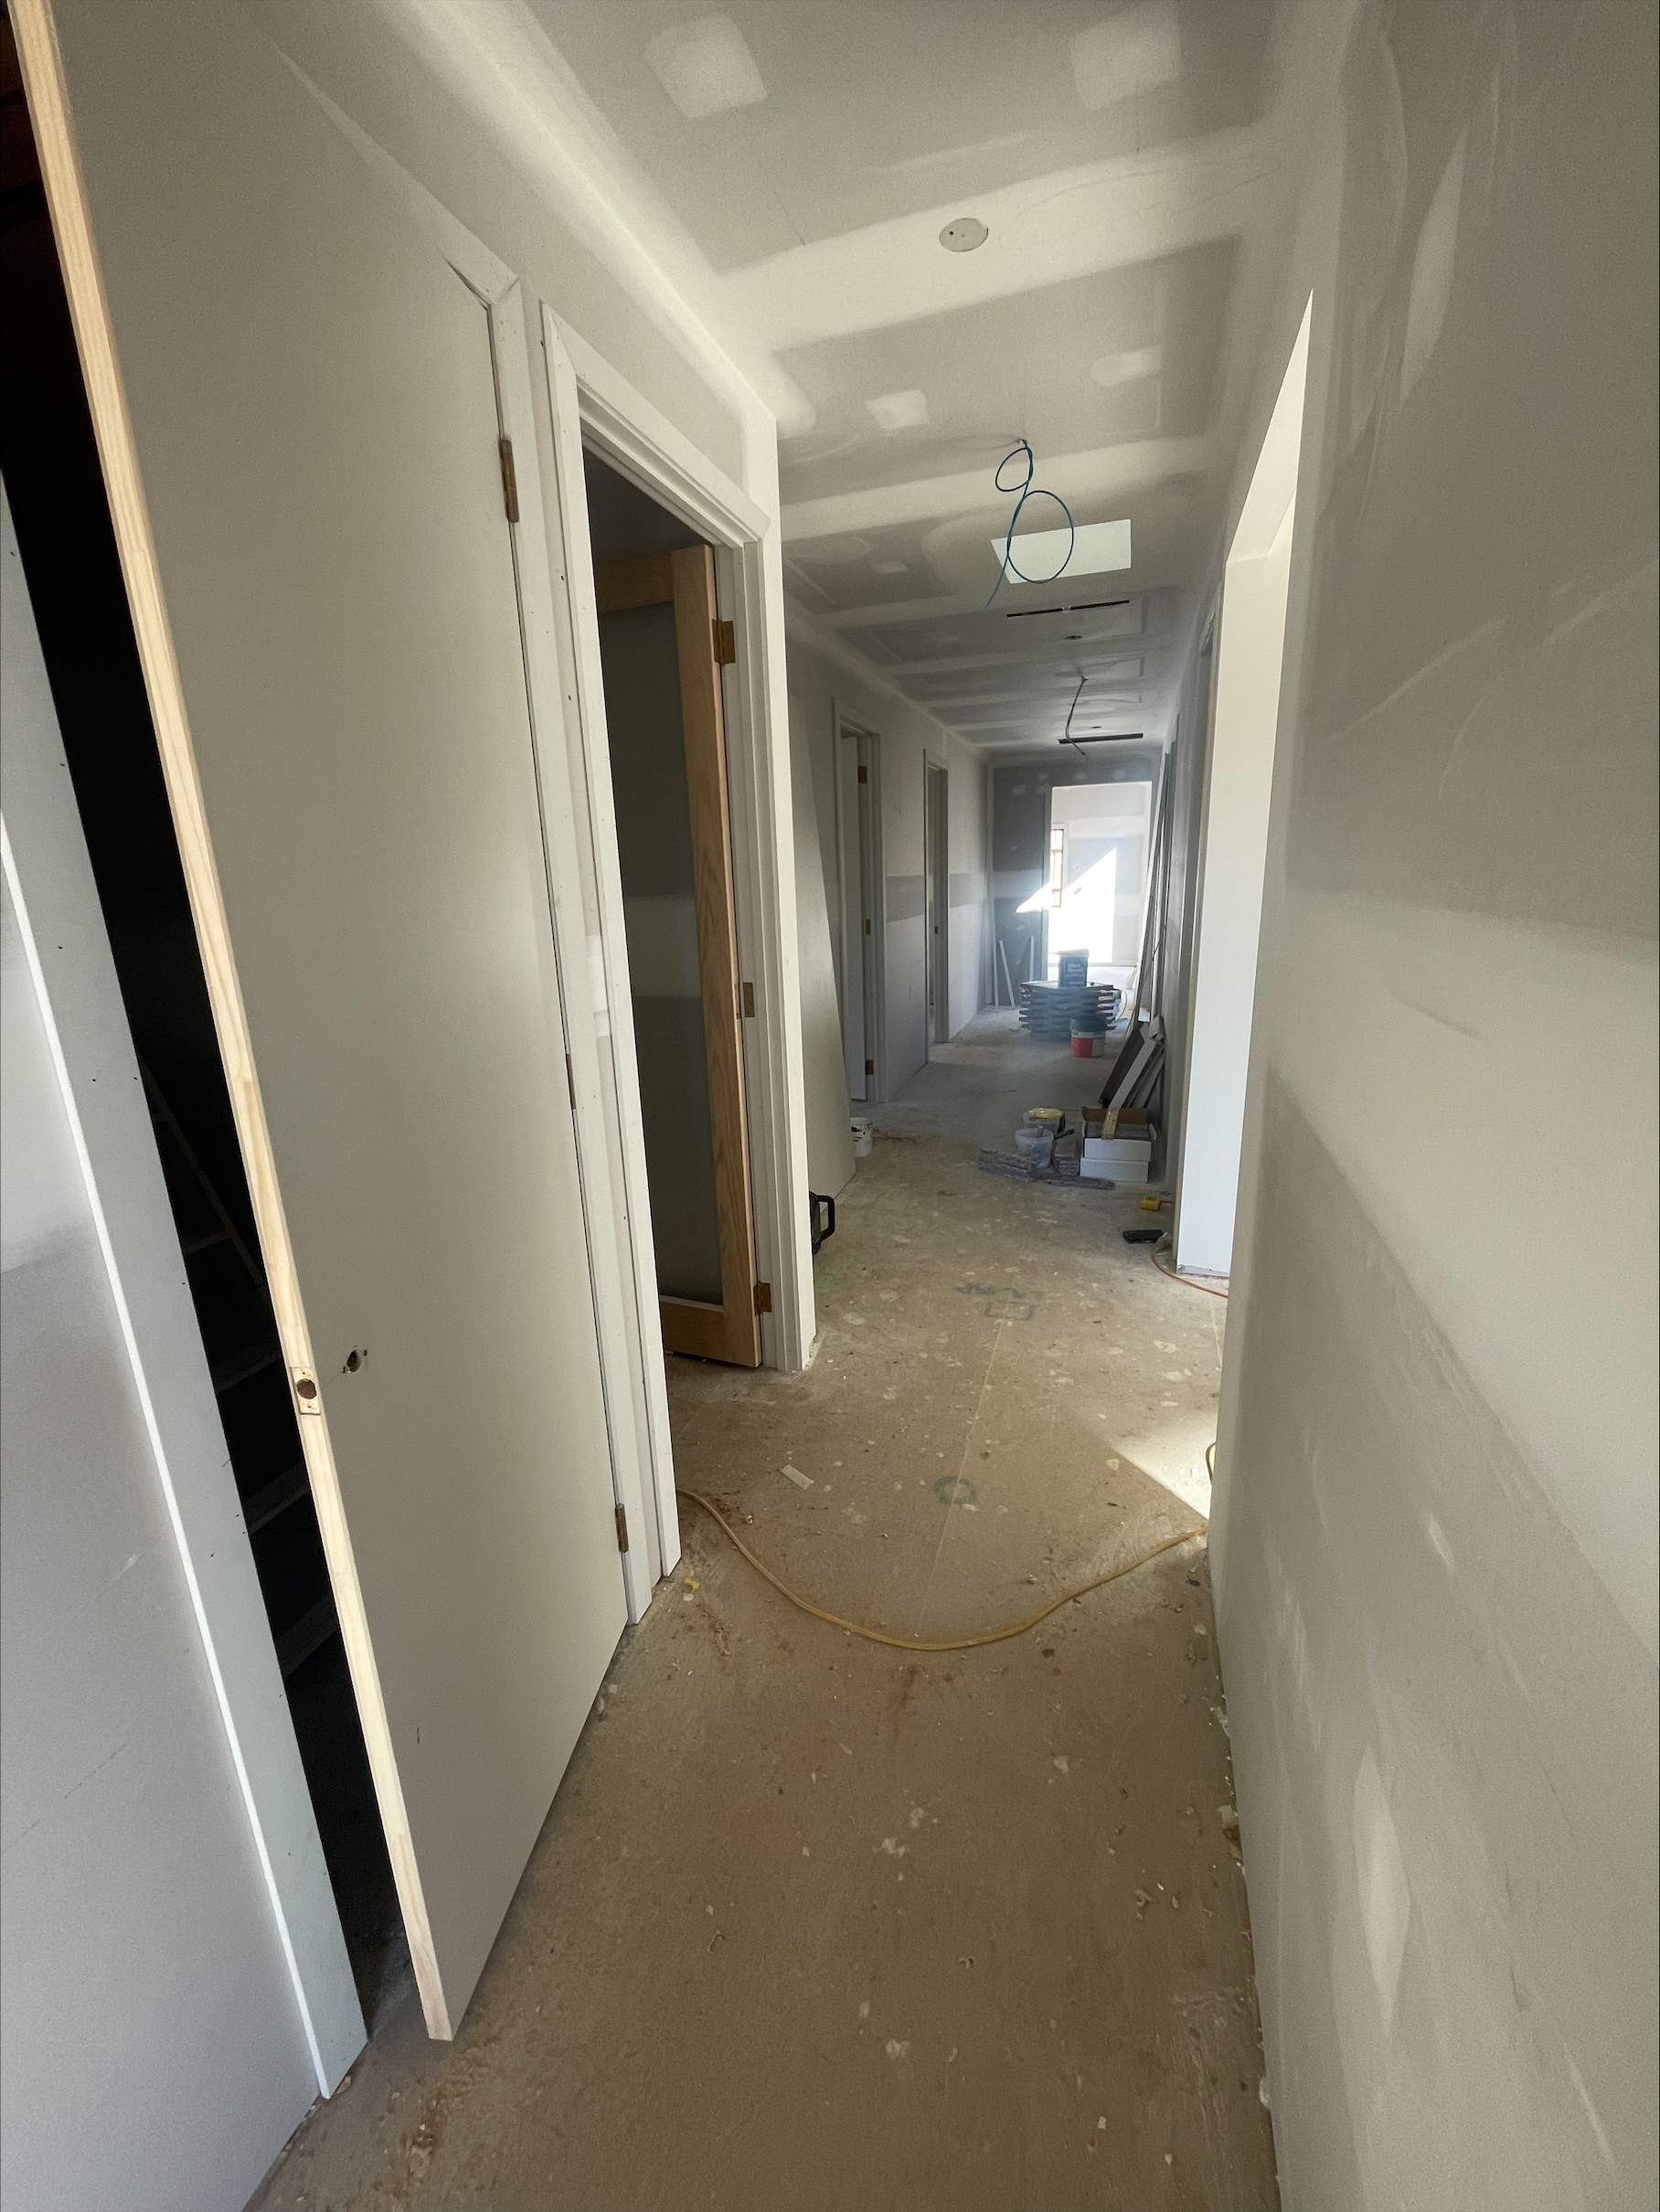
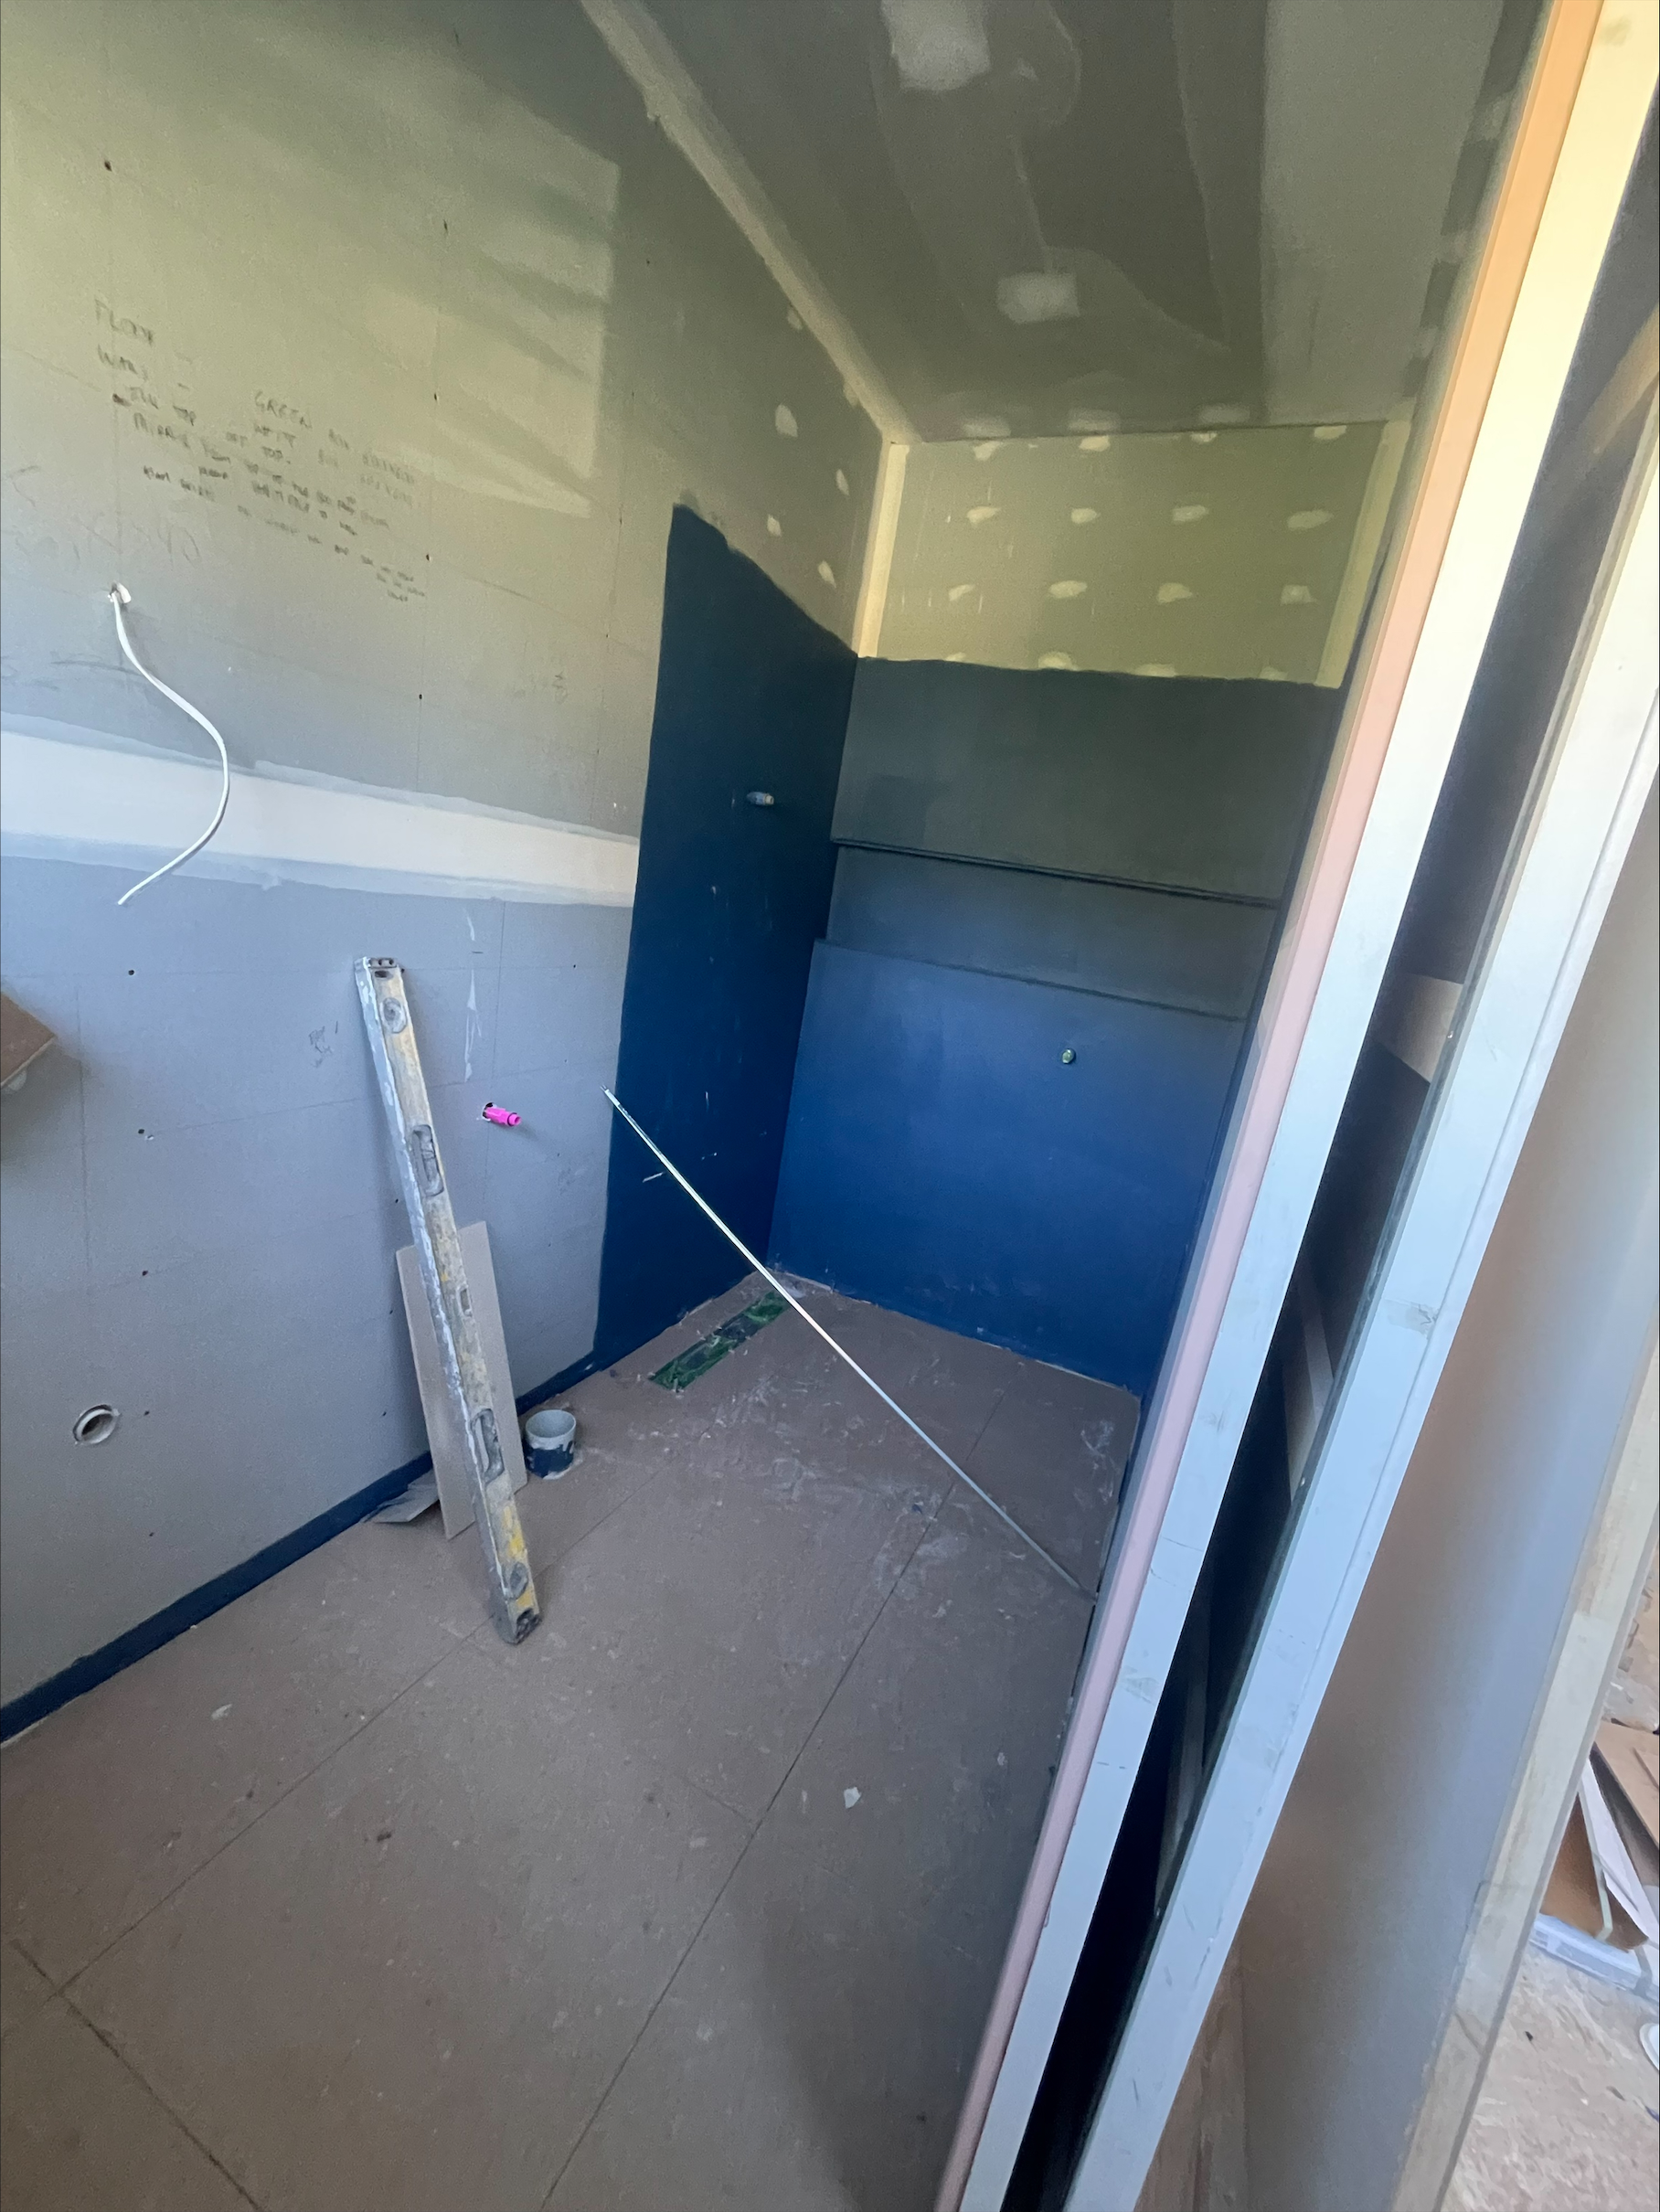
Plasterboard is one of the most defining trades in a residential build because it’s the first time the client sees the home as actual rooms rather than framed cavities. The ceiling pitches, raked lines, skylight reveals, window returns, and bulkheads all come into focus during this stage.
On this build, the plasterers have worked through the open-plan living, kitchen and dining zone, the hallway, the bedrooms, and the three wet areas. The raked ceilings throughout the living spaces have been sheeted to follow the roof pitch, with the skylight shafts framed and lined to draw natural light deep into the floor plan. Every junction between rake and flat, wall and ceiling, has been set with care, because once paint goes on, every imperfection becomes permanent.
A few details worth noting at this stage:
- Square-set and shadow-line detailing where specified, requires significantly more precision than a standard cornice and leaves no room for movement or gapping.
- Skylight reveals built and sheeted to maintain clean, parallel lines that frame the sky rather than distract from it.
- Bulkheads and ceiling drops that conceal services, define zones, and create the transitions between standard and raked ceilings.
- Wet area linings using moisture-resistant sheeting in the bathrooms, laundry, and any other areas exposed to humidity, as a base layer before waterproofing.
With plaster nearing completion, the focus now shifts to flush set finishing, final sand-back, and handover to the painters. From there, every subsequent trade — tiling, joinery, paint, electrical fit-off — relies on the plaster being straight, square, and true.
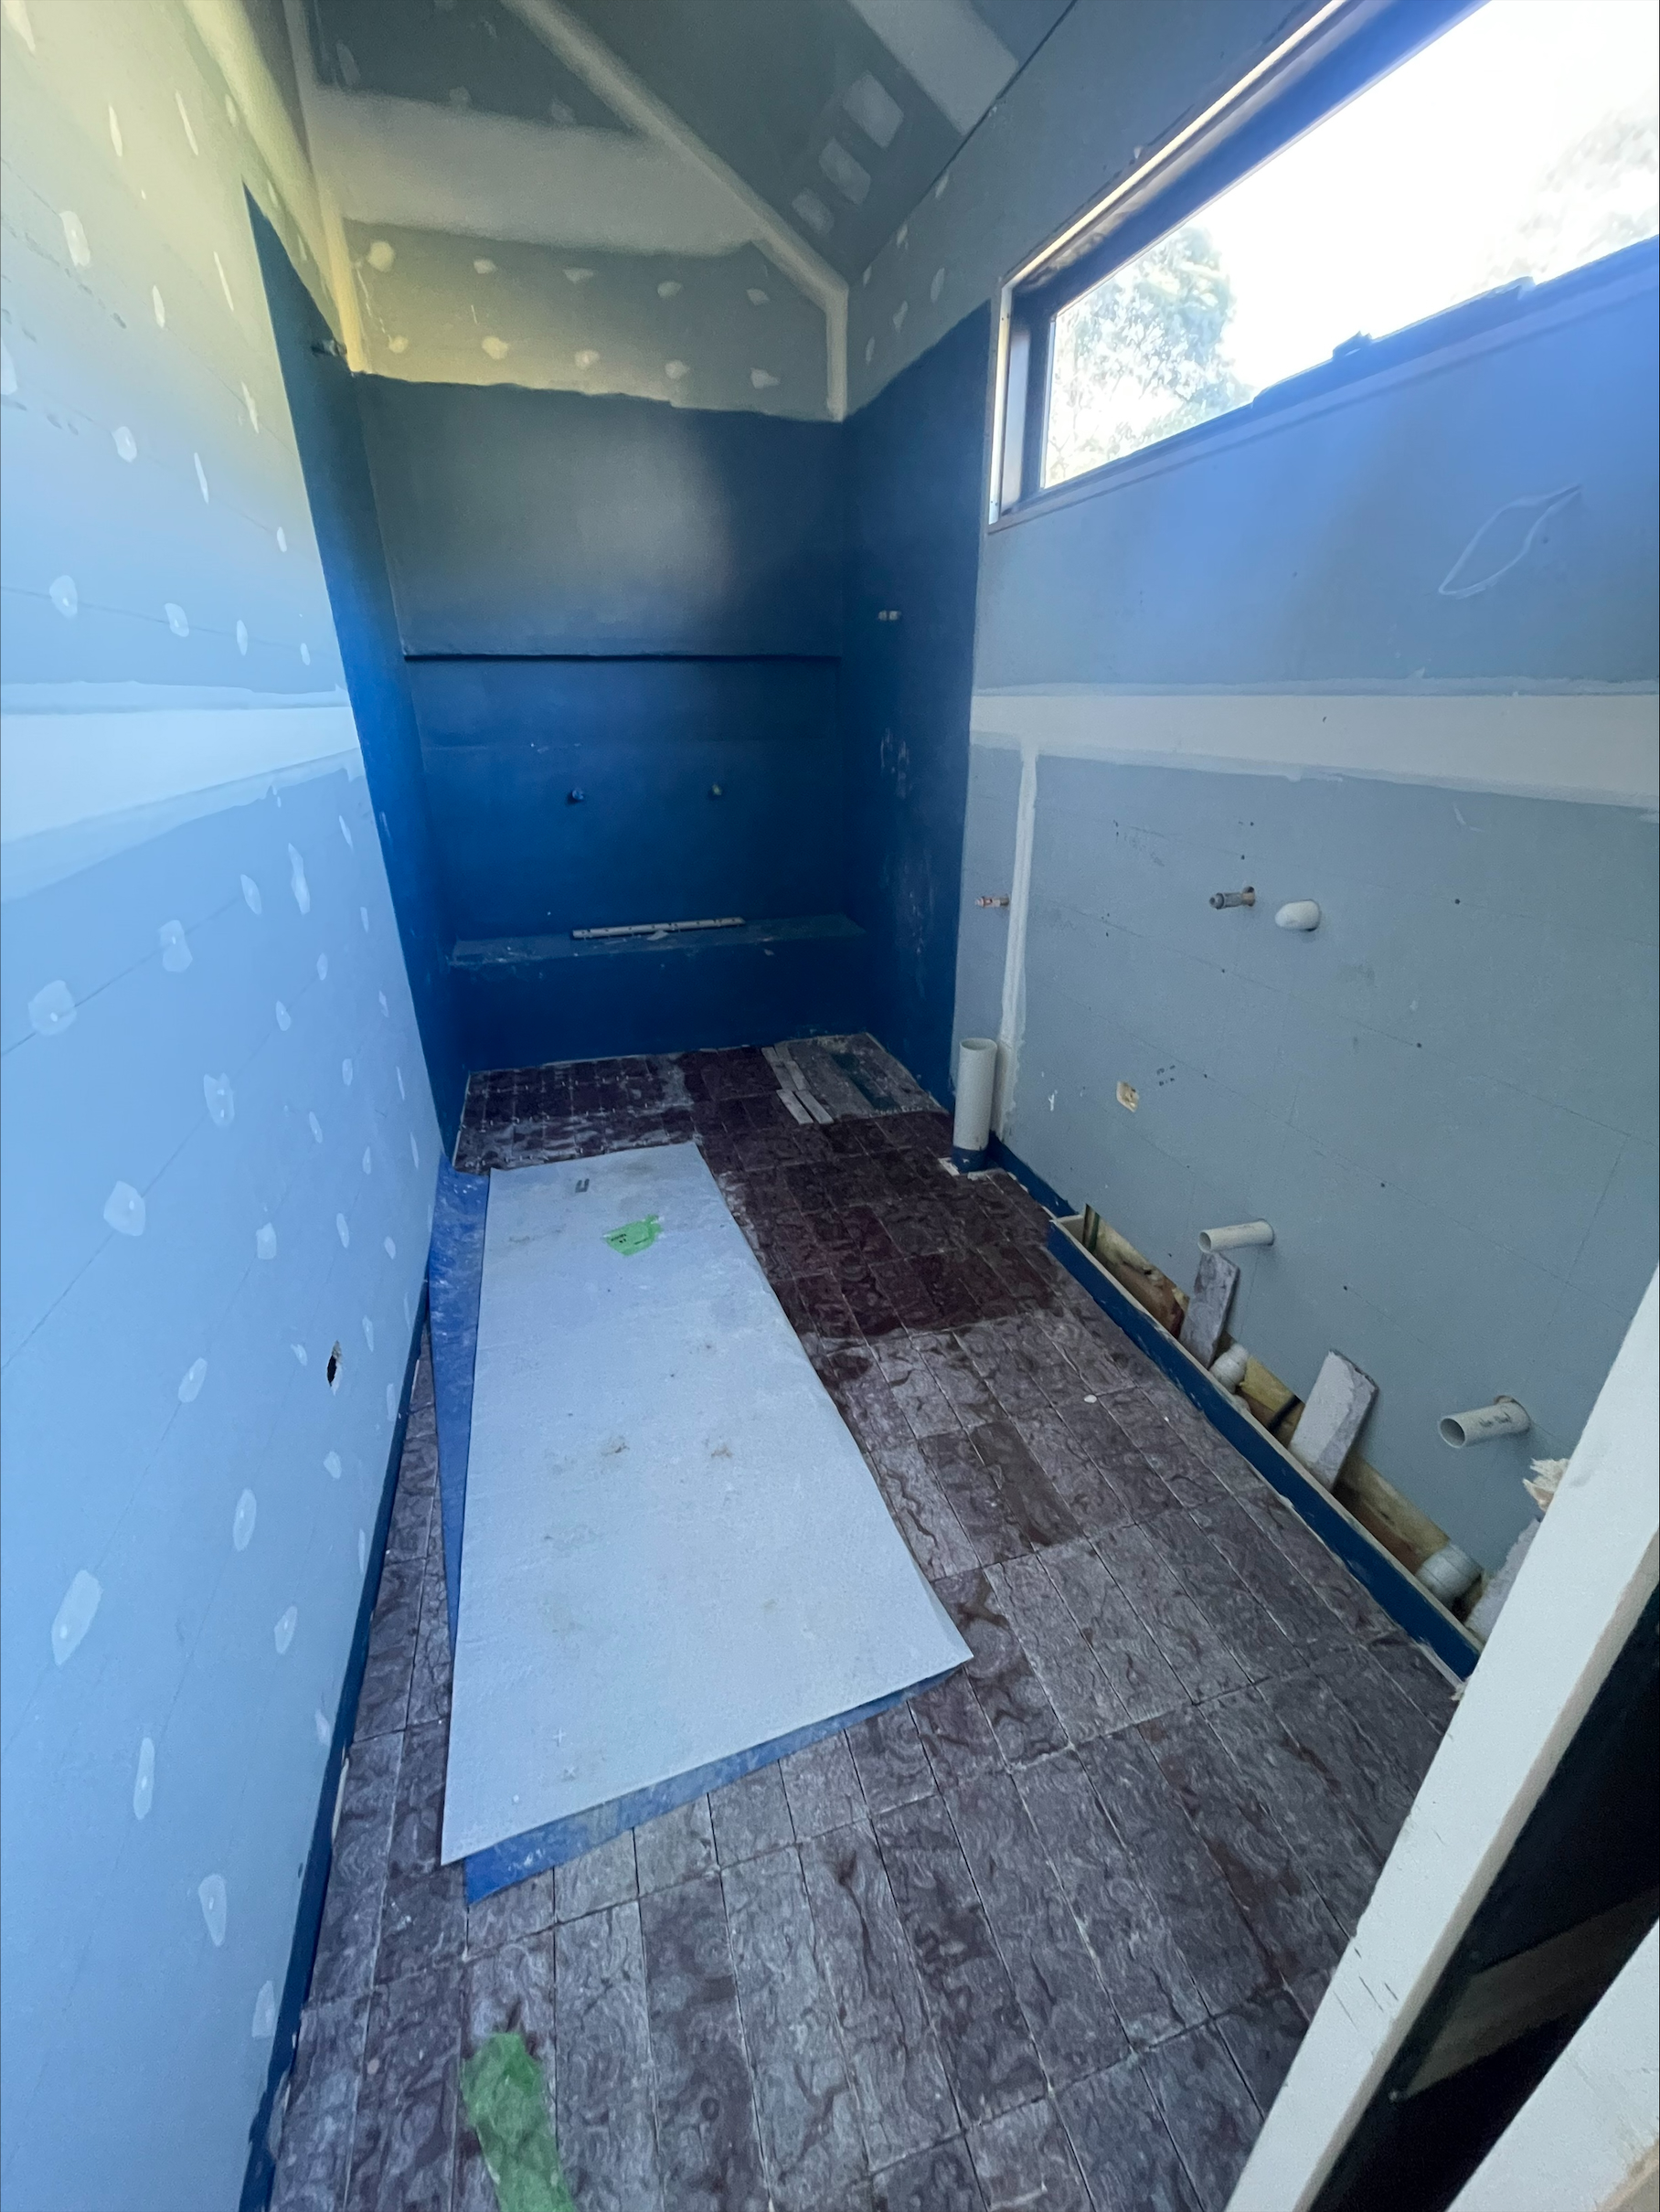
Tiling and Waterproofing in the Wet Areas
The tiling stage has commenced across the three bathrooms on this project: two ensuites and a main bathroom. Each space has been designed with its own combination of features — wall niches, bench seats, bath hobs, and under-tile heating — with all three bathrooms incorporating walk-in shower bases with a flush, level transition between the shower floor and the surrounding bathroom floor.
Before a single tile is laid, however, the most important work happens — and most of it will never be seen again.
Why Waterproofing Is the Most Critical Trade in a Bathroom
Waterproofing is the single most failure-prone trade in residential construction, and the consequences of getting it wrong are severe. A poorly waterproofed bathroom doesn’t fail immediately; it fails slowly, behind the tiles, inside the framing, often only revealing itself years later through swollen skirtings, blown plaster, rotted timber, or mould tracking through adjoining rooms. By the time it’s visible, the damage is structural.
On this project, waterproofing is being carried out in strict accordance with Australian Standard AS 3740 — Waterproofing of domestic wet areas. The standard sets out exactly which surfaces must be waterproofed, to what height, and how the membrane must interface with floors, walls, hobs, niches, and penetrations. Some of the specific requirements being applied across the three bathrooms include:
- Full shower enclosure waterproofed to a minimum height of 1800mm on all walls within the shower zone.
- The entire bathroom floor is waterproofed where a walk-in shower without a hob is used, because there is no physical barrier preventing water migrating into the broader floor area.
- Wall-floor junctions treated with a bond breaker and reinforced with membrane fillet to allow for natural building movement without splitting the membrane.
- Penetrations (waste outlets, taps, shower mixers) sealed with collars and reinforcing fabric, as these are statistically the most common failure points.
- Bath hobs and bench seats fully wrapped in membrane before any tile or stone is laid, including their tops, sides, and junctions with adjoining walls.
- Wall niches are lined and waterproofed as a complete sealed pocket, with falls built into the niche base to drain back into the shower rather than sit in the recess.
The membrane is applied in two coats, with the second laid perpendicular to the first to eliminate pinholes, and each coat is left to cure properly before the next is applied. Skipping any one of these steps is how waterproofing fails — and it’s why we treat it as a non-negotiable, fully documented stage of the build.
Walk-In Shower Bases and Flush Floor Transitions
All three bathrooms feature walk-in shower bases with a flush, level transition between the shower floor and the surrounding bathroom floor. There is no step, no hob, and no visible threshold — the shower simply continues from the bathroom floor.
Clients increasingly request this detail because of how clean and contemporary it looks, and because it future-proofs the home for accessibility. But achieving it is significantly more demanding than a traditional stepped or hobbed shower. The shower floor falls must be set into the substrate before tiling, with falls of 1:80 to 1:60 directing water to a linear or square waste — not relying on the tile bed alone to create fall. The waterproofing membrane must be carried across the entire bathroom floor, not just the shower zone, because the absence of a hob means water can travel. And tile selection must be appropriate for wet area floor use, with sufficient slip resistance under wet conditions.
When done correctly, the result is a seamless, gallery-like wet area where the eye travels uninterrupted from doorway to back wall. When done poorly, it’s the fastest way to flood an adjoining room.
Why This Stage Matters
The plaster and tiling stage is where a home stops looking like a construction site and starts looking like somewhere people will actually live. But it’s also the stage where shortcuts are most tempting and most damaging. Plaster that’s been rushed will show through paint forever. Waterproofing that’s been skimped on will cost tens of thousands to remediate within a few years. At TEMSEA, we treat both trades as the foundation for everything decorative that follows. Get them right, and the home performs and presents the way it should for decades. The next stages on this project will see the painters move through behind the plasterers, tiling progress across all three bathrooms, and the joinery and fit-off trades begin staging. We’ll share further updates as the home moves toward completion.
Start your Project with Temsea
.webp)